3D Printing - Living Hinges
Your masterclass in product design and development
Protolabs’ Insight video series
Our Insight video series will help you master digital manufacturing.
Every Friday we’ll post a new video – each one giving you a deeper Insight into how to design better parts. We’ll cover specific topics such as choosing the right 3D printing material, optimising your design for CNC machining, surface finishes for moulded parts, and much more besides.
So join us and don’t miss out.
Insight: 3D Printing - Living Hinges
Transcript
Hi, it’s Friday which means it’s time for another Insight video from me.
Each week we take a look at a different aspect of additive manufacturing. In this week's video we look at material properties and what you need to have in mind when considering the role your part has to play.
This time around we’re going to be talking about a nifty piece of design and how to tackle it with 3D printing – living hinges.

Now, even if you haven’t heard the name before, you probably know what a living hinge is. They’re thin, flexible hinges that are made of the same material as the pieces it connects – think of the lid of a box of mints or even the middle of those fold-up, disposable spoons you get when you buy a yogurt.
They’re great little pieces of design – cheap, easy to make and highly effective – but while injection moulding can easily produce living hinges that have a long, reliable lifespan on finished products, it can be a little trickier to get them to work when you’re 3D printing up prototypes.
While it is possible to create robust and functional living hinges with technologies like selective laser sintering and multi jet fusion, you need to take a little more care during the design stage. This may even require that the hinge be designed one way during the prototyping stage, and then redesigned before moving to injection moulding.
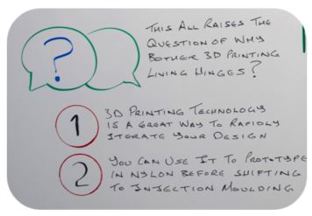
This all raises the question of why bother 3D printing living hinges in the first place? Well, there are a few reasons.

First, 3D printing technology is just a great way to rapidly iterate your designs, and that can often outweigh all the technical niggles in the world.
Secondly, you can use it to prototype parts in nylon before shifting to injection moulding. And finally, you can always use it as functional, end-use parts if your actual quantity needs are low.
So, how do we go about making living hinges work as well as they can with 3D printing?
The first principle to keep in mind is that the hinge always needs to be the weakest area of the part. If the living hinge is roughly the same thickness as the rest of the geometry, then the part will distort and flex when you’re attempting to use the hinge – not ideal.

Next up, you need to bear in mind that the force needed to bend a hinge is proportional not only to the thickness of the hinge, but also its width. To make things a little easier, then, you can think about modifying one big hinge into several smaller ones. Rather than have a single 20mm hinge, you could have, say, three 5mm ones with gaps between them. That reduced width means you need less force to operate the hinge and therefore less stress is placed on the clasps, snaps, and the geometry as a whole.

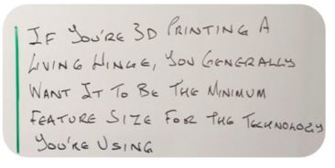
Cutting this down is important because living hinges are under constant stress when in use. One side of the hinge is going to be under compression, while the other side will be under tension. As well as making them as narrow as possible, we also want to make them as thin as possible. If you’re 3D printing a living hinge, you generally want it to be the minimum feature size for the technology you’re using.

On top of this, the layout of the hinge design can be incredibly important. To explain why we need to get a little technical, and though I appreciate that not everyone wants a hefty dose of maths in their videos, we need to break out a couple of formulas if we want to understand what’s going on.
The important one for living hinges is L = πR, where L is the length of the hinge and R is the distance between the hinge and the attachment point.

This little formula is the ideal relationship between those two values, as it ensures that the hinge will form a nice, neat semicircle when it’s closed. This should evenly distribute the stress along the hinge and minimise it at the attachment point.
If the hinge is too short or the distance to the attachment point is too large, the hinge will be under tension in its closed position. Essentially, the curve the hinge makes is too shallow and it’ll try to pull itself apart.
On the other hand, if the hinge is too long or the attachment points are too close, stress will be concentrated at the attachment points as well as the middle of the hinge. The excess hinge material will act as a spring and try to pry the pieces apart – which is rather the opposite of what you want it to do.
So, if you keep all this in mind there’s no reason why you can’t make use of living hinges in your 3D printed prototypes. Just make sure to chat to your manufacture if you have any queries.
On which note, I think our time is gone, but I hope to see you again next week.
With special thanks to Natalie Constable.


