
Insert Moulding
Your masterclass in product design and development
Protolabs’ Insight video series
Our Insight video series will help you master digital manufacturing.
Every Friday we’ll post a new video – each one giving you a deeper Insight into how to design better parts. We’ll cover specific topics such as choosing the right 3D printing material, optimising your design for CNC machining, surface finishes for moulded parts, and much more besides.
So join us and don’t miss out.
Insight: Insert Moulding - Adding Durability and Strength
Transcript
Hello and welcome to this week’s insight.
This week we’re going to take a closer look at insert moulding.
As I am sure you know plastic injection moulded parts are tough. They can withstand heavy loads, moderately high temperatures and the corrosive effects of acid and alkalis. Plastic is also lighter and usually cheaper than metal.
But sometimes plastic needs a bit of a helping hand. It might be the bore in an all plastic pulley that wears too quickly, or tapped in holes in moulded handles and knobs that are prone to stripping. Well, you can have the best of both worlds by bolstering these areas with a metal insert.
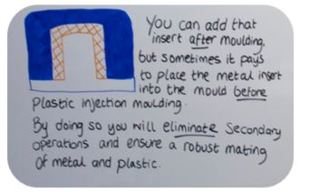
You can of course add that insert after moulding, but sometimes it pays to place the metal insert into the mould before plastic injection. By doing so you will eliminate secondary operations and ensure a robust mating of metal and plastic.
But before you think that this could be the answer to all your problems, there are a few things that you should know.

First of all, you will pay slightly more for insert moulding and the lead time will be longer than single part injection moulding.
This is because the threaded insert, bushing, sleeve, or boss is manually placed into the mould.
So, when would you opt for insert moulding?

Well it’s worth thinking about for any application where your plastic part needs greater strength or wear resistance in certain areas.
Any plastic component that is attached to a mating piece with screws or bolts is a prime candidate. Another is for a bearing surface where a bronze or brass bushing will increase the product life, perhaps for a fan blade or a drive gear.
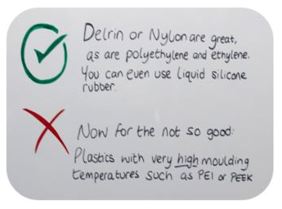
Okay, let’s take a look at which thermoplastics you can use for insert moulding. Stiff engineering grade plastics like Delrin or nylon are great, as are polyethylene and ethylene. You can even use liquid silicone rubber.
Now for the not so good: and I’m talking about those plastics with very high moulding temperatures such as PEI or PEEK. This is because inserts are often hand loaded and if, like us, your supplier has a quick turnaround process using non-cooled tools to reduce part cost and speed up processing, then you really don’t want to be placing an insert into a mould that’s been heated to several hundred degrees. It’s like reaching into a hot oven to grab a freshly baked biscuit – you’ll burn your fingers!
Let’s move onto the inserts themselves. You will probably find that your supplier does not provide them, because there are plenty of companies who produce them for moulded plastic parts. If you look at one, it’s often knurled on the outside, or has a special shape – this is to hold it securely in place. One word of warning when you outsource inserts, make sure you ask this supplier for the CAD file, because you will need it along with the part design and assembly drawings to get a quote and project analysis.
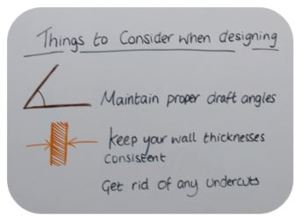
When it comes to designing the part, the good news is that you need to think about the same things as for any other injection moulded part. Maintain proper draft angles, keep your wall thicknesses consistent, get rid of any undercuts, in fact all the usual stuff that we’ve talked about in our previous Insight videos.
That little chunk of metal does need a bit of extra thought though.
As I have said, most suppliers will probably hand load the insert into the mould. Those moulds are normally quite warm, so the operative will be wearing gloves. You know what it’s like trying to handle small fiddly things while wearing gloves, well it means that they may ask for a minimum size of insert. At Protolabs for example, we prefer inserts bigger than 3.17mm across, but that’s still quite small when you think about it.

Also, no insert should be too deep inside the mould, we recommend a 2:1 hand clearance to depth ratio.
Your supplier may also need to orientate the part differently to place and retain the insert, because we don’t want it falling out do we? Inserts also need to be consistent in size, we recommend a tolerance of 0.05mm on locating surfaces to avoid flashing.
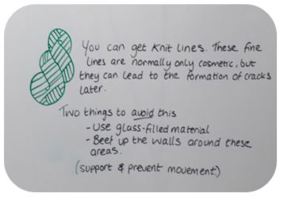
And finally, when molten plastic flows around an object, such as your insert, and then rejoins it on the other side, you can get knit lines. These fine lines are normally only cosmetic, but they can lead to the formation of cracks later. There are two things you can do to avoid this; the first is to use a glass-filled material and the second is to beef up the walls around these areas. Slightly thicker walls or ribs in the area around the insert are a good idea to support it and prevent movement.
These are all things that your supplier should pick up and advise you about as part of their design for manufacturability analysis, so as always work closely with them.
Right that’s it for this week. I look forward to seeing you again next Friday.
With special thanks to Natalie Constable.


