Let’s face it, plastic injection-molded part design is often a balancing act between speed, cost, and part quality. The good news is that all three are easily achievable by following a few basic rules and asking the right questions. Take flash, for instance. Yes, it’s an inevitable fact of injection molding that some small amount of flash will occur from time to time. Sorry about that. But here again, a few design tweaks can reduce or even eliminate this nuisance, none of which are especially difficult to implement.

Flash not only affects the cosmetics of a part, but it can also affect functionality, making it difficult to merged finished parts.
What is Flash in Injection Molding?
If plastic injection molding were like painting a living room, flash would be the traces of Burnished Clay or Hague Blue that seep around the masking tape. That’s because all plastic injection molds contain parting lines, which to one degree or another, allow small amounts of molten plastic to escape the mold cavity’s machined boundaries. So do gates, vents, sliding cams, pick-out inserts, and any other place where metal meets metal—all can be responsible for creating that randomly-shaped bit of excess material called flash that must be removed from the finished part.
Using "Moats" for Easy Removal of Flash
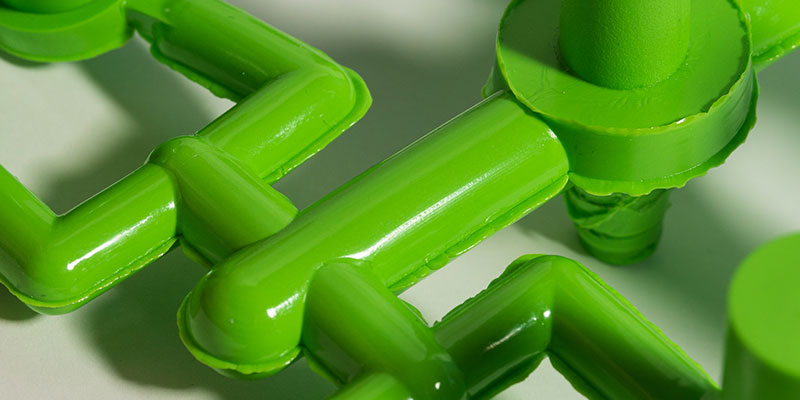
With simple, easily moldable shapes and parts made of more viscous polymers like high-density polyethylene (HDPE), flash is less of a problem. On the other end of the scale, there’s liquid silicone rubber (LSR), which has such low viscosity that it seems to flow like water. Here, flash is inevitable no matter what the part geometry, which is why we often design molds with “tear strips” that resemble a moat around a castle. As their name implies, these tiny rivers of material surround the part periphery and are easily torn away after molding.
Finishing and Flash
For other materials, moving the parting line is sometimes the best tactic for reducing flash, particularly if it sits in a cosmetic area or when the mold halves intersect at a side-action or pick-out location. And speaking of cosmetics, be aware that polishing the mold to improve the part’s surface finish tends to wear away the nice, crisp edges produced during mold machining, thus increasing the chance of flash. So do bead blasting or texturing of the mold, which can impart a slight radius to machined parting lines. We’re not suggesting that polishing and texturing of molds should be avoided, but it’s important to set expectations so that you can plan accordingly.

Flash is a flaw in a part that happens when resins ooze out of the mold, typically at the parting line. An extra production step is needed to remove flash cleanly.
Taking Steps to Avoid Flash with Injection Molding Design
Other flash considerations include the need for increased draft on sliding shutoffs. Depending on the material, part geometry, and shutoff orientation, a draft angle of several degrees is a good starting point, although more might be needed. Very large or thick parts might require higher pressures to ensure proper material flow and filling of the mold, making flash more likely. The same goes for glass- or fiber-filled materials. Similarly, higher pressures are often needed when molding parts with openings that use large pass-through cores—a bezel for a tablet PC, for instance—or parts with long, narrow sections like support arms. Such parts might also call for additional vents to allow air to escape (along with a small amount of plastic) during the molding process.
After the Mold
We identify these and other potential problem areas during the online quoting and moldability analysis phases and are happy to work with you on your part design to minimize flash as much as possible. However, in those instances where flash is unavoidable, don't despair. Flash removal is not difficult. For low quantities, a razor blade is the most expedient solution, while sandpaper or vibratory finishing can be used to smooth parting lines on larger production runs. And some companies offer cryogenic finishing of injection-molded parts, freezing and tumbling the plastic sufficiently so that flash breaks away. Whatever the situation, flash is nothing to be feared.

If you have any issues getting your guide, click here to download.


