Metal 3D Printing Service Cost Explained
This article examines the key factors that affect the price of metal 3D-printed parts

It may seem straightforward. In the images below, at right, which of these two CAD models would be cheaper to metal 3D print?
If you selected the cross-linked wire design, well done! Let’s look at why that is. Most people assume material costs are the primary driver, but that is not the case with all 3D-printed parts. The solid cube obviously requires more material than the cross-linked design.
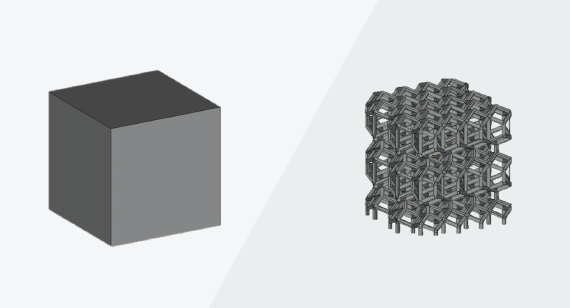
However, the solid cube presents a challenge because of a larger cost driver – machine time. “Chunky” metal parts are difficult to 3D print due to the internal stresses that build up in the part during the layer sintering process.
They can be built if truly needed, but the results may require multiple builds to dial in the machine parameters as well as additional post processing steps to get the final part within specification.
In this simple example, the solid cube is a better candidate for a machining operation, while the cross-linked design would be impossible to machine.
With less material in the cross-linked design, the machine laser requires far less travel distance compared to the condensed cube. Eliminating laser travel distance results in a faster build. A faster build means a lower cost part.
Support structures are typically required so DMLS parts are effectively welded to the build plate and secured throughout the layering build up. The solid cube must be supported with many layers of support scaffolding to keep it welded firmly to the build plate during sintering. The cross-linked design does not require any self-supporting structures. This translates to a reduction in machine up time and elimination of labor tied to finishing steps required to remove the support structures.
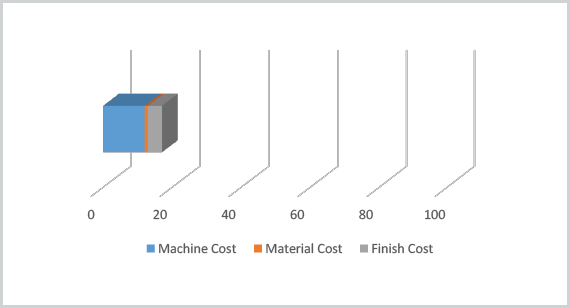
Here’s another example of an everyday application: a bottle opener, depicted at left and below. This bottle opener was designed to be machined. When we aim to metal 3D print the bottle opener as designed, machine time and finishing costs are the largest contributors to the percentage breakdown of the overall part cost.
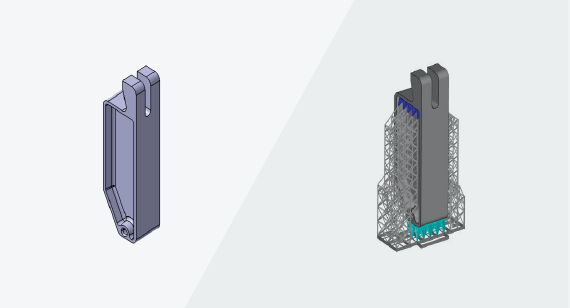
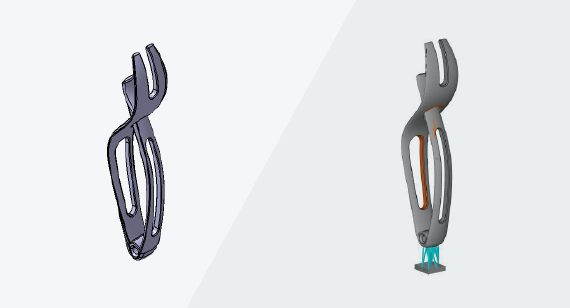
This bottle opener has been re-designed to achieve 85% part cost reduction. Features were shelled and thick cross sections were eliminated. It is lighter and functions to open a bottle with no problem. With this design, we see that less laser is required to produce this part. Less laser time translates to less machine expense. In addition, with the smaller footprint and no exterior support structures on the wings, many more of these bottle openers can be printed during one build cycle resulting in high volume efficiency gains.
Cost of Setup for Metal 3D-Printed Parts
Compared to traditional forms of manufacturing, like casting or molding, metal 3D printing has one key advantage for designers and developers. With printing, the cost and time associated with a custom tool is completely eliminated.
While there are tools out there, like this cost calculator, to understand the costs associated with desktop printers and operation, industrial-grade machines that are used for metal additive manufacturing require a significant upfront investment and operational infrastructure compared to the desktop printers.
For industrial 3D printers the setup costs are much higher than desktop printers due to the power required, material and build volume considerations, and parameter setup validation work required.
These machines can range in price from $20k for a small photopolymer printer to millions of dollars for a large-frame metal printer. Depending on the technology, there may be other operating costs associated with material recycling, inert gases, lasers, part washers, and safe handling operations.
Machine maintenance, calibration, and a skilled workforce are things to consider when investing in an industrial printer. Based on Protolabs’ R&D experience with a large format metal 3D printer, the GE X Line 2000R, one can plan for around two months of setup and validation work taking place before the machine is ready to start making parts.

Part Cost Drivers for 3D Printing
Costs associated with metal 3D-printed parts are primarily driven from machine time and labor required to finish parts. In DMLS, material cost is not the primary cost driver. Build resolution will also impact the cost of printing a metal part. High resolution (versus standard) will require more layers, which in turn leads to longer build times.
Cost of Post Processing of 3D-Printed Parts
Post-processing of 3D-printed parts is a highly manual operation. It is a necessary step for 99% of 3D-printed parts straight off the printer. The majority of the cost associated with finishing a part is associated with the labor required to remove supports or excess powder. Thinking about the workflows for different technologies and materials, costs may look differently depending on the process used. A typical post-processing workflow for a metal 3D-printed part requires a stress relief application prior to support structure removal, which is labor intensive as the supports are welded to the part and build plate. In addition to support removal, a variety of heat treatments and surface finish treatments can be applied to achieve a desired hardness or surface roughness.

All in all, labor costs plus the cost of the materials and machinery needed to get a 3D-printed part to optimal state should be factored into the equation. If you are looking for ways to optimize and reduce your 3D printed parts costs, check out these six cost-cutting tips from our applications engineering team.


