


Sheet Metal Punching Service
Achieve scale and customization with punched components and assemblies delivered in as fast as 3 days.
Certifications ISO 9001:2015 | ITAR
Free Design Review for Punching Projects
Our design review consists of a 30-minute virtual meeting with one of our sheet metal applications engineers. It’s an opportunity to discuss any questions you may have about your project. Common discussion questions on the topic of punching include:
- In-house punch tooling selection
- Material height and depth parameters
- Feature spacing (from bends, part edges, or nearby features)
Our online sheet metal punching service can deliver functional, end use products to you in days. With each project, you get design for manufacturability (DFM) feedback and expert-level support. You can choose from a broad range of finishing options to achieve your aesthetic requirements.
Punching is frequently used for:
- Functional prototyping
- Product testing and qualification
- End use production parts
- Bridge production or pilot runs
What is Punching?
Sheet metal punching is a metal cutting/manipulation process in which a punch press applies force to material using tools referred to as the punch and die to create profiles, holes, and other formed shapes.
The punch shears the sheet metal against a die in a fast, repetitive process to create a precise series of features and cutouts.
Types of features that can be punched through the Protolabs process include:
- Countersinks
- Part profiles/perimeters
- Hole features
- Perforation patterns
- Formed features (e.g. ribs, dimples)

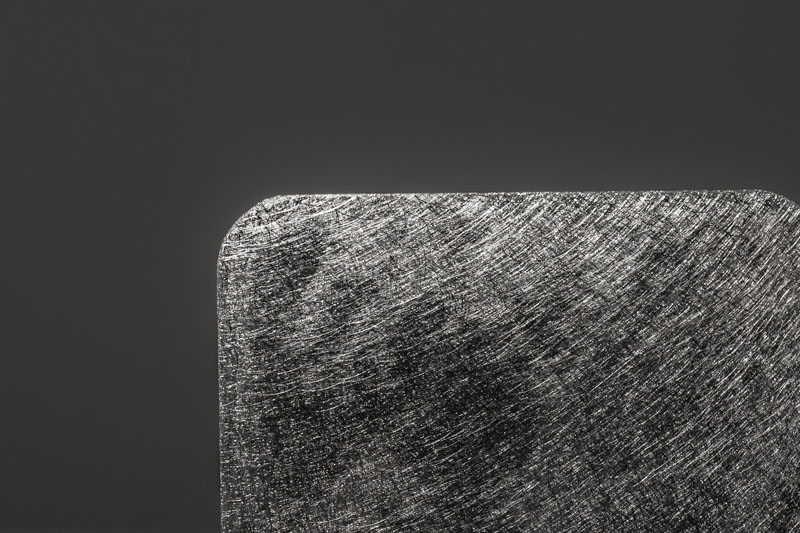
Precision punching adds features to your project with unmatched accuracy.
Advantages of Punching with Protolabs
Using Protolabs for punching unlocks several advantages for your next sheet metal component or assembly project:
- Quick turnaround times: Punched parts are delivered in as fast as 3 days.
- Design flexibility and customization: Achieve punch-formed features using in-house or custom tooling.
- Access to technical advice: Our applications engineers are available to make sure your project meets your specs.
- Expansive capacity for production volumes: We fabricate thousands of unique geometries each month across quantities from 1 to 1000+.
Materials for Punching
Most sheet metal material types can be cut using punching or laser cutting techniques, however the thickness range is different. Refer to the list below for information on eligible material thicknesses:
- Aluminum 5052-H32: thicknesses from 0.040 in.-0.250 in. (1.016mm-6.35mm)
- Aluminum 6061-T651: thicknesses from 0.040 in.-0.250 in. (1.016mm-6.35mm)
- Aluminum 6061 is suitable for profile/perimeter punching but is not eligible for formed features.
- Low Carbon Steel CR 1008: thicknesses from 0.036 in.-0.119 in. (0.914mm- 3.023mm)
- CR Galvanized: thicknesses from 0.036 in.-0.119 in. (0.914mm- 3.023mm)
- CR Galvannealed: thicknesses from 0.036 in.-0.119 in. (0.914mm- 3.023mm)
- Copper C101, C110: thicknesses from 0.040 in.-0.125 in. (1.016mm-3.175mm)
- Brass C260: thicknesses from 0.040 in.-0.125 in. (1.016mm-3.175mm)
- Stainless Steel 304/304L, 316/316L: thicknesses from 0.036 in.-0.074 in. (0.914mm-1.88mm)
Aluminum 5052-H32 offers corrosion resistance as a formable and weldable material.
Design Guidelines
Punching sheet metal parts can be complex, so to make it easier to incorporate into your next project, here is a list of helpful manufacturability reminders to consider during the design process. These guidelines can help you manage project costs and achieve high part quality.
- Space your holes 1.5x the material thickness apart. Cluster tools create holes at a distance of 1x material thickness, where single hit hole tools need additional material to maintain the same hole quality.
- Design your smallest holes at 1.2x material thickness.
- Minimize the number of unique punch-formed feature sizes/shapes throughout your design. Using the same sized features saves on machine setup time (and possible tooling costs).
- Specify typical punch feature tolerances within a range of +/-.005in. (+/- 0.127mm). It is important to keep in mind that tolerances in the flat state differ from those in the formed state. Refer to our tolerance guide for additional information on how to navigate feature tolerances that cross multiple bends.
- Consider the dimensional length of any progressive punch features (e.g. ribs, louvers, cluster patterns). Extensively long features can result in quality issues such as warping.
- Keep all your formed features facing a uniform direction. Designs that include form and form down features are at risk for quality issues.
The additional punching design guidelines below can be a useful resource in achieving dimensionally accurate and quality punched parts.
- Maximum formed feature height: 4x material thickness.
- Tool station diameters directly correlate to recommended space between punch-formed features. For feature spacing, we recommend using 50% of the tool station diameter:
|
Tool Station Diameter |
Space Required Between Features |
|
0.500 in. (12.7mm) |
0.250 in. (6.35mm) |
|
1.250 in. (31.75mm) |
0.625 in. (15.875mm) |
|
2.000 in. (50.8mm) |
1.000 in. (25.4mm) |
|
3.500 in. (88.9mm) |
1.750 in. (44.45mm) |
|
4.500 in. (101.6mm) |
2.250 in. (57.15mm) |
Punch Form Tooling
Punching provides functionality and customization for sheet metal projects through profile and form tooling shapes. The information below is a reference for common cutout and formed features we offer. If you have questions about tool selection (in-house or custom) take advantage of a free 30-minute design review with our applications engineers.
Note that custom punch tooling adds to your project’s price and lead time. If cost is a priority, we recommend an in-house tooling option. During your design review, we will discuss what dimension is most important for your design (e.g. height, inside diameter, outside diameter, open area, etc.) to provide an adequate in-house tooling recommendation.
Lance Tab
This form tool cuts and raises a section of the sheet metal to create a hook or tab shape. Lance tabs are used for mechanical fastening/hanging, ventilation, clips, and stops.
If your design contains several small, simple bends, a single-hit punch tool may be the most effective manufacturing and cost management method.
Single hit vs. progressive tooling: single hit only
Bridge Lance
Bridge lances come in many shapes and sizes. Our in-house options are primarily single bridge form-up tools, but custom tooling is available upon request. Bridge lances are different from lance tabs because they use two points of contact with the sheet, creating a bridge-like feature.
Bridge lances are used for decorative or functional purposes, including clip attachments, airflow, cable pass-throughs, or fastening.
A bridge lance feature has similar functionality to TD (cable tie-mount) hardware available through PEM®
Single hit vs. progressive tooling: single hit only
Extrusion
Punched extrusions in sheet metal designs are formed by pushing material through a die to create a raised shape. Common extrusion applications are electrical contact points, threaded holes, standoffs, and airflow or gas channels.
For production situations where higher quantities are needed, extrude and tap features can be a successful alternative to hardware insertion, resulting in lower part costs.
Single hit vs. progressive tooling: single hit only
Half Shear
This versatile tool option partially cuts through the sheet and creates raised features or intentional material deformations. Half shears can help to provide visual and physical markers for assembly processes because parts can snap together or serve as an alternative to tabs or lances.
Single hit vs. progressive tooling: single hit only
Perforation Pattern (Cluster Tool)
Perforations come in many shapes and sizes but they have a single goal of punching a hole/slot design while leaving a small amount of material left between the holes/slots. These types of design elements are typically best achieved in the punch, as heat from a laser can contribute to material deformation. A cluster tool is commonly used to create multiple holes/slots with a single hit of the punch. The image shows an in-house hex pattern tool.
With perforations, an important design consideration is that the size of the hole or feature should be equal to or greater than the material thickness. Additionally, consider designing the webbing or space between features to follow the same material thickness guidance.
Perforations are commonly used for ventilation, such as an opening for a case fan. They are also used for filtration, drainage, decorative or weight reduction use cases.
Single hit vs. progressive tooling: single hit only
Louver
Louver tools create a slotted opening or vent and are common to panels or electrical enclosures made from sheet metal. When applied to electronics enclosures, louvers aid in ventilation and thermal management of internal components.
Single hit vs. progressive tooling: eligible for both
Rib
Typically, ribs are oblong shapes of raised metal used to aid in strength, rigidity, or stiffness of a design. Furthermore, ribs can add strength without increasing weight. They can have a flat top or a half-round profile. In electronics enclosures, ribs can help with thermal management as well as design rigidity.
Ribs can also create a gap between components, raising a second component off the base of the main component.
Single hit vs. progressive tooling: progressive only
Emboss
Emboss, or dimple, form tools offer functional or aesthetic enhancements to sheet metal geometries. This type of feature can be used singularly or in a pattern and act as a spacer, mounting point, or to provide general visual appeal. Embosses can come in any shape but most commonly they are round, obround, or rectangular.
Embosses can hold magnets or hide hardware heads without compromising the structural integrity that a concealed head provides.
Single hit vs. progressive tooling: single hit only
Assembly
Sheet metal designs that incorporate punched features can be standalone parts, but are more commonly found in assemblies, sub-assemblies, or weldments.
We offer the following assembly construction services, so when your project arrives, it is ready for immediate use:
- Hardware insertion
- Welding (single and multiple component)
- Riveting
Lead time: Assembly lead time adds 1-3 days (based on the number of components).

Our assembly services allow customers to use their parts on arrival.
Finishing Options for Punched Parts
In addition to feature or geometry customization, our finishing services for punched components and assemblies allow for customization of your aesthetic requirements. Our finishing options include:
- Plating
- Powder coating
- Wet paint
- Masking
- Part marking
- Metal surface finishing
Please visit our finishing options page for additional information.
Lead time: Most finishing options add 1-2 days per finish. Our finishing options page offers more details.

A variety of finishing options adds the necessary aesthetics to any sheet metal part.


